Savory Mini Quiches: A Just a Little Bite Recipe
Looking for a delicious brunch idea? These savory mini quiches are a family favorite! Join me in creating this justalittlebite recipe that everyone loves.

Just a Little Bite: Savory Mini Quiches
Have you ever been at a party, just minding your own business, when suddenly – bam! – someone presents you with a tray of irresistible little savory bites? you lean in, cream cheese and bacon-infused mini quiches staring back at you like a snack-sized hug.
Honestly, it's like they know how to draw you in! that’s how i first discovered the justalittlebite recipe . these small delights are perfect for brunch or any gathering.
A Delicious Journey Through Quiche
Mini quiches have a delightful charm, don’t you think? they started as a french classic but have transformed into the ultimate crowd-pleaser over the years.
Like so many yummy recipes, they took a simple tradition and then boom —added creative flair. these days, you can find them stuffed with everything from fresh veggies to deli meats, making them wildly popular and versatile.
Now, if you're worried about time and difficulty, fret not! prep usually takes about 15 minutes , and if you’re using a store-bought crust , you can whip these up in no time.
We'll talk about making your own later, but know you can still get that homemade vibe with a store-bought option.
They’re perfect for those busy weeks when you're looking for quick and easy appetizers.
Budgets and Bites
Let’s talk bucks. making a batch of these bite-sized quiches won’t break the bank; they’re super cost-effective! the ingredients? pretty standard stuff, nothing too fancy.
In fact, you’ll probably spend less than $15 to create around 24 of these delicious little guys. that’s like getting an elegant snack idea for the price of a couple of coffees—score!
Why You’ll Love ‘Em
Now, onto the good stuff—why making these mini quiches is such a game-changer! first off, they pack a nutritional punch.
With eggs providing protein and tons of versatility with vegetable quiche recipes , you can sneak in all kinds of colorful veggies.
Think spinach, bell peppers, or even mushrooms if you're feeling adventurous. they not only taste great but help you hit those veggie goals too!
These mini quiches are also perfect for special occasions. whether you’re hosting a brunch or just having friends over, they’ll have guests raving about your personalized quiche recipes .
Honestly, it’s kinda hard to resist when a tray of golden, flaky pastry beckons!
Also, the best part? if you have any leftovers, they freeze great for next week’s lunch or an impromptu snack.
Just pop one in the microwave and relive your victorious cooking moment. who doesn’t want a little winner in their fridge ready to go?
Let’s Get Cooking
Ready to jump into the fun of making your own delicious quiches? gather up your ingredients and hold on tight because you're about to impress yourself! from flaky crusts to savory pastry snacks , every bite is going to be a celebration of flavor.
You can sneak in your favorite cheese, swap in tofu for a vegan twist, or toss in leftover meat from last night’s dinner.
Seriously, these quiches are your blank canvas! no matter what you choose, they’ll be a blast to customize, and a crowd-pleaser to boot.
So, if you’re ready to dive in, let’s take a look at the ingredients you’ll need!
Essential Ingredients Guide
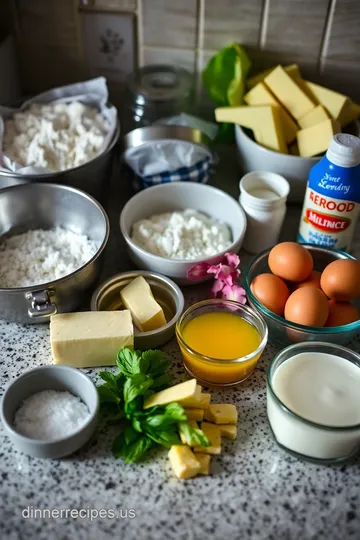
Whipping up a delightful dish like savory mini quiches requires a solid foundation, and that starts with the right ingredients.
Let’s dive into the essential ingredients , the magic that turns ordinary bites into extraordinary flavors.
Premium Core Components
Every great quiche begins with its crust . for a flaky base, you’ll need 2 cups (240g) of all-purpose flour, which you should ideally measure with a kitchen scale.
This helps keep your measurements precise, accounting for variations in flour density. you’ll also want 1 teaspoon (5g) of salt to enhance that flavor.
Don’t forget your 1/2 cup (115g) of chilled unsalted butter, cubed, which is the secret to flaky magic. add 4-6 tablespoons (60-90ml) of ice water, adjusting as needed to hold your dough together.
For the filling, get ready for a flavor explosion! you’ll need 6 large eggs and 1 cup (240ml) of heavy cream to create that creamy goodness.
Sprinkle in 1 cup (100g) of shredded cheese—go with cheddar, mozzarella, or your personal fave. next, toss in 1 cup (150g) of diced vegetables.
Think bell peppers or mushrooms. on top of that, add 1 cup (150g) of a cooked protein like bacon or even tofu for the vegan folks.
Don’t forget salt and pepper!
Storage tip: Keep your ingredients cool. Eggs and cream are best stored in the fridge.
Signature Seasoning Blend
Let’s sprinkle a little magic onto those quiche bites! a good quiche isn’t just about the basic ingredients . i’m all about crafting a signature seasoning blend .
Fresh herbs like parsley or chives can elevate your dish from basic to elegant.
Feel free to play with spices too! a touch of smoked paprika can bring a smoky depth, while a pinch of nutmeg adds warmth.
Explore regional flavors—why not try a mediterranean twist with sun-dried tomatoes and feta cheese?
Smart Substitutions
Ever hit a snag in the kitchen? don’t panic! here’s where those smart substitutions come in. running low on cream? swap it for half-and-half or even a splash of milk—it’ll work in a pinch.
Looking for a gluten-free option? use a store-bought gluten-free crust or make your own using almond flour.
Don’t forget about seasonal ingredients! use what's fresh from your garden or farmer's market. think fresh zucchini for summer or kale in the winter.
Adjusting according to what’s available can not only save you a trip to the store but also delight your taste buds.
Kitchen Equipment Essentials
Now, let’s talk tools. to make these perfect bite-sized quiches, you’ll need a few must-have tools . a mixing bowl is crucial for combining your ingredients.
A muffin tin is your best friend here. plus, a whisk makes blending your eggs and cream a breeze.
If you’ve got a rolling pin , great! if not, you can use a wine bottle—whatever works! just remember to keep your kitchen organized.
Storing your equipment properly can save you those last-minute kitchen hunts when you’re in the cooking groove.
Wrapping Up
All of these elements come together to make the best mini quiches—whether you’re prepping for a fancy brunch or just whipping something up for your family.
Here’s the deal: you can customize your quiche with whatever ingredients you fancy, making them perfect for party finger foods or your next gathering .
So, gather those quiche ingredient ideas and get ready to dive into the step-by-step instructions of creating your own justalittlebite recipe .
Get excited; these mini quiches might just become a regular feature at your table!
The Art of Professional Cooking
Essential Preparation Steps
Alright, let’s dive in! to kick things off in the kitchen, you gotta master the art of mise en place .
That fancy term just means you need to have all your ingredients prepped and ready to go. think of it like gathering your party supplies before the guests arrive—organization is key! chop your veggies, whisk those eggs, and measure out that cream before you even think about firing up the oven.
Time management is also crucial. nobody wants to be stuck chopping onions while the oven is blazing. set a timer for everything; you’ll thank me later.
Have everything within arm's reach, and trust me, you'll flow like a pro! also, safety first, you guys. always use sharp knives—it's safer than dull ones.
Trust me, i’ve had my share of kitchen mishaps. don’t forget to keep a towel handy to wipe your hands and counter!
Step-by-Step Process
Here’s where we lay it out, step-by-step.
-
Prepare the crust: grab that flour and salt, mix ’em up, then cut in that chilled butter. it should look like coarse crumbs.
Add ice water gradually until the dough comes together. chill it for 30 minutes because cold makes for a flaky crust.
-
Preheat the oven: Get that baby running at 375° F ( 190° C) while your dough chills.
-
Roll it out: Dust that counter and roll your cold dough to 1/8-inch thick . Cut circles that fit your muffin tin. This part is a game-changer for those perfect mini quiches!
-
Blind bake: Prick the bottoms with a fork and pop them in the oven for 10 minutes .
-
Prepare the filling: Now grab those eggs and cream, whisk ‘em good! Toss in your choice of veggies and proteins. Think bacon, spinach, or even tofu if you’re feeling adventurous.
-
Assemble and bake: Pour that delicious filling into the crusts and bake for another 20 minutes until everything is set and a bit golden.
-
Cool before serving: Let ‘em chill for a bit, garnish with fresh herbs, and boom—mini quiche perfection!
Expert Techniques
Okay, so you want to level up your game? here’s where some pro techniques come in. always make sure your egg mixture is whipped just enough to incorporate air, that'll give your quiche that airy texture.
Check for doneness by giving the tin a little jiggle; it should only slightly wiggle in the center.
And oh, the flavor checkpoints! before pouring in your filling, taste it to ensure everything’s on point . this isn’t just about following the recipe—make it your own.
If you accidentally over-season, add a splash of cream to tone it down.
Success Strategies
Now, let’s talk about common pitfalls. Overfilling your mini quiches can lead to some serious messes in the oven. Trust me, nobody wants a soggy bottom. Keep it just below the edge.
And ensure that you’re stashing any leftovers right after they cool down. they freeze beautifully, so you can have quick meals ready when you need them.
Just pop them in the oven for a quick reheat.
If you wanna make-ahead, you could prep everything in advance, freeze the unbaked quiches, and bake them straight from the freezer—just add a few extra minutes! Use your creativity for fillings—there’s no limit when it comes to these savory quiche bites!
In the culinary world, there’s always room to experiment and explore. You know how I love a good justalittlebite recipe , especially when I can whip it up before company arrives!
Additional Information
So, there you have it! simple, savory, and oh-so-satisfying, these mini quiches are perfect for brunch or those last-minute gatherings.
With just the right amount of creativity, you can whip up a dazzling spread that impresses your friends and family.
So go on, grab that muffin tin, and start crafting those delightful little bites!

Pro Tips & Secrets for Your Just a Little Bite Recipe
Creating your own savory mini quiches can feel like a culinary adventure! here’s what i’ve learned through trial and error, and trust me, it’s all golden wisdom that’ll help you nail this easy mini quiches recipe .
Chef’s Insights
Start by chilling your butter when making the crust. seriously, a cold crust is the difference between a flaky dish and a sad, soggy one.
I once made mini quiches with room temp butter, and let's just say i was not impressed with the outcome.
Once you get the crust down, whisk those eggs and cream vigorously! it gets air into the mix, which leads to a fluffier filling.
Take my word for it!
Time-Saving Techniques
Make your homemade quiche crust in advance! you can chill it overnight, or even freeze it. when you’re ready to bake, all you need to do is thaw it and roll it out.
Plus, another great trick? use a muffin tin quiches approach and load up different fillings in one batch. you’ll have a mini quiche for every taste bud at your table!
Flavor Enhancement Tips
Don’t be shy with spices and herbs! basil, thyme, or even a dash of nutmeg can take your filling to new heights.
I often throw in leftover roasted veggies or whatever's wilting in my fridge. trust me, vegetable quiche recipes can handle a lot of love!
Presentation Advice
You came for the yum, but let’s be real: we eat with our eyes first! try to plate your mini quiches on a colorful serving platter.
Add a sprinkle of herbs or a drizzle of balsamic reduction for a pop of sophistication. the moment your guests see those bite-sized quiches , they won’t know what's hit them!
Perfect Presentation
Now, let’s get into the fun part— plating ! Here are some tips to make that quiche look as good as it tastes.
Plating Techniques
Stack those mini quiches with a slight overlap to show off the delicious layers. Use a simple white dish; it really makes those vibrant colors pop.
Garnish Ideas
Fresh herbs are your best friends here. chives, parsley, or even some baby arugula sprinkled on top creates that “fancy restaurant” vibe.
A couple of cherry tomatoes on the side wouldn’t hurt either!
Color Combinations
Remember, a feast for the eyes is as important as a feast for the stomach. Mix your veggies well. Bright bell peppers with dark sautéed spinach look stunning together.
Storage & Make-Ahead
Let’s keep it real: busy lives need make-ahead options !
Storage Guidelines
Allow your mini quiches to cool completely before popping them in the fridge. They'll last about 3-4 days if stored in an airtight container.
Preservation Methods
Want to stash a batch for a rainy day? freeze them! just make sure to tightly wrap each one in plastic wrap before placing them in a zip-lock bag.
They’ll be good for about 2 months .
Reheating Instructions
A quick tip: i usually reheat my quiches in the oven at 350° f ( 175° c) for about 10- 15 minutes.
This keeps them nice and crispy. microwave if you're in a pinch, but you might lose that flaky goodness.
Creative Variations
Bored of the same ol’ flavors? Spice it up with these ideas:
Flavor Adaptations
How about a quiche with bacon for that smoky goodness? Or maybe a quiche with tofu for a plant-powered option? You’ll be surprised how awesome they can be.
Seasonal Twists
Use what's in season! Late summer? Load up on zucchini and corn. Fall? Think butternut squash and sage.
Complete Nutrition Guide
Here's the scoop if you're counting your macros.
Detailed Breakdown
Each mini quiche has roughly 180 calories . Not too shabby for a snack that packs a punch!
Health Benefits
Eggs are great for protein, and if you're loading up on veggies, you're getting fiber and vitamins.
Expert FAQ Solutions
Got questions? Let’s tackle some common ones.
Common Questions
“Can I use gluten-free flour?” Absolutely! Just swap it out with your favorite blend, and you’re good to go.
Troubleshooting Guide
If your filling rises too much, you might’ve over-whisked. Less is more, folks!
Success Tips
Don’t skip the cooling period after baking. It really helps to set those flavors.
With all this info, you’re ready to rock that justalittlebite recipe . Trust me, these savory pastry snacks will disappear faster than you can say mini quiche! So roll up your sleeves, get those ingredients together, and happy baking! Your next brunch is about to be the talk of the town!

Savory Mini Quiches: A Just a Little Bite Recipe Card

⚖️ Ingredients:
- 2 cups (240g) all-purpose flour
- 1 teaspoon (5g) salt
- 1/2 cup (115g) unsalted butter, chilled and cubed
- 4-6 tablespoons (60-90ml) ice water
- 6 large eggs
- 1 cup (240ml) heavy cream
- 1 cup (100g) shredded cheese (cheddar, mozzarella, or your choice)
- 1 cup (150g) diced vegetables (spinach, bell peppers, onions, mushrooms)
- 1 cup (150g) diced cooked protein (bacon, ham, or tofu)
- Salt and pepper to taste
- Optional: Fresh herbs for garnish (e.g., parsley, chives)
🥄 Instructions:
- Step 1: Combine flour and salt in a large bowl.
- Step 2: Cut in the butter until the mixture resembles coarse crumbs.
- Step 3: Add ice water, one tablespoon at a time, until a dough forms.
- Step 4: Chill in the refrigerator for 30 minutes.
- Step 5: Preheat the oven to 375°F (190°C).
- Step 6: Roll the chilled dough on a floured surface to about 1/8-inch thick.
- Step 7: Cut into circles to fit into the muffin tin.
- Step 8: Press the dough circles into the muffin tin and prick the bottoms with a fork.
- Step 9: Blind bake for 10 minutes.
- Step 10: Whisk together eggs and heavy cream in a mixing bowl.
- Step 11: Stir in cheese, vegetables, and protein. Season with salt and pepper.
- Step 12: Pour the filling into the baked crusts, filling until just full.
- Step 13: Bake for an additional 20 minutes or until the filling is set and golden.
- Step 14: Let cool for 5 minutes, then remove from the tin.
- Step 15: Garnish with fresh herbs if desired.
Previous Recipe: How to Make Instant Pot Chinese Braised Pork Belly: 5 Amazing Tips!
Next Recipe: How to Make Lava Foot and Saltric Soup: A Delicious Adventure!